I have already mentioned my problem regarding the afterburner detent on my X52 Pro HOTAS. After some time, the makeshift solution with the tape starts to wear off and becomes unreliable. A software solution seemed like a better idea.
How to set it up
First you need to download and install some additional software:
- VJoy - creates virtual joysticks. Note: there are multiple VJoy versions. Look for them online if the one above isn't working for you.
- JoystickGremlin - will be used to map our real X52 to the virtual one created by VJoy.
- optional: HIDHide - will hide our real X52 Pro inside Windows, to make using our virtual joystick more convenient.
Basically, we'll create a virtual joystick that has all the buttons that our real X52 Pro has, except for a slight modification to the throttle. We will adjust the throttle so it only goes up to 99%. We will use the slider on the X52 to move it to 100%, thereby engaging the afterburner.
Add all of your buttons and axes that you have on the X52 Pro (or other HOTAS) and map them to the virtual one. Use basic Remap functions for that.
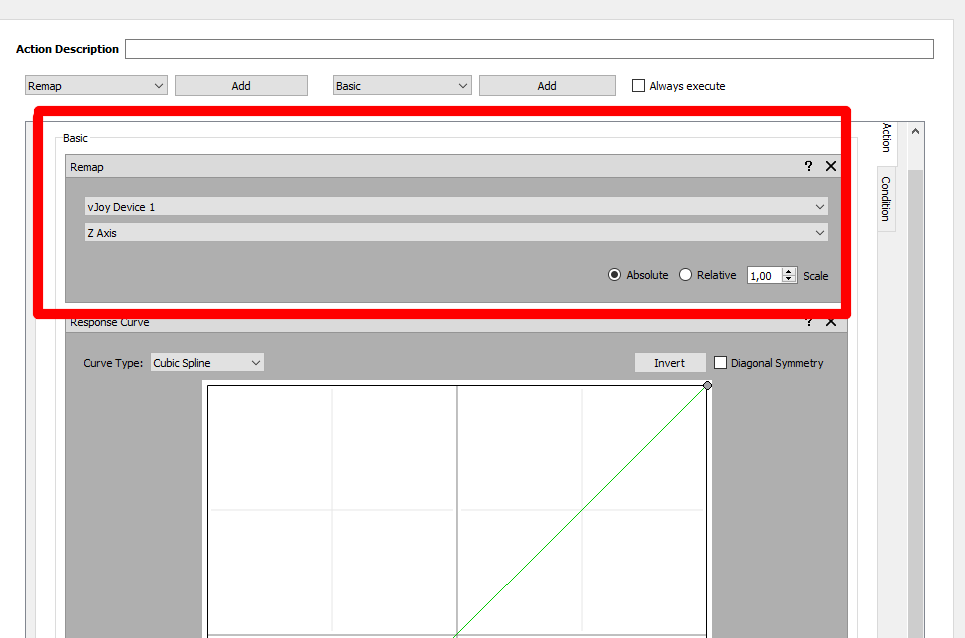
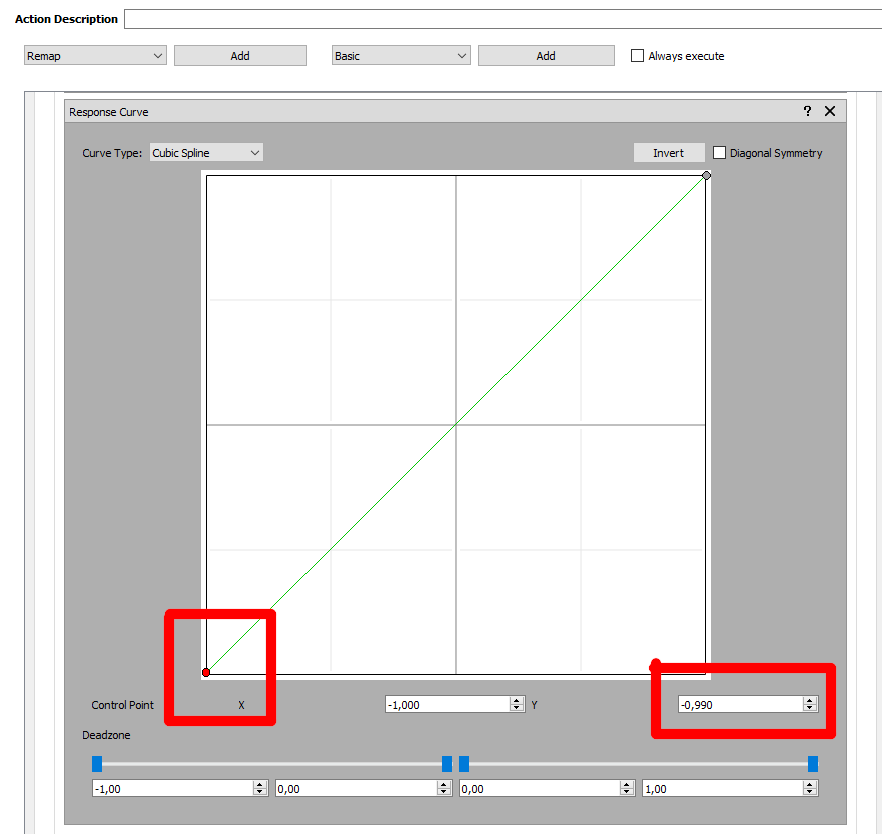
After that, we'll also add a Response Curve to our Z axis (throttle axis). Adjust the bottom-left point, so that the Y value goes to -0,990. That's the maximum position (no idea why it's reversed).
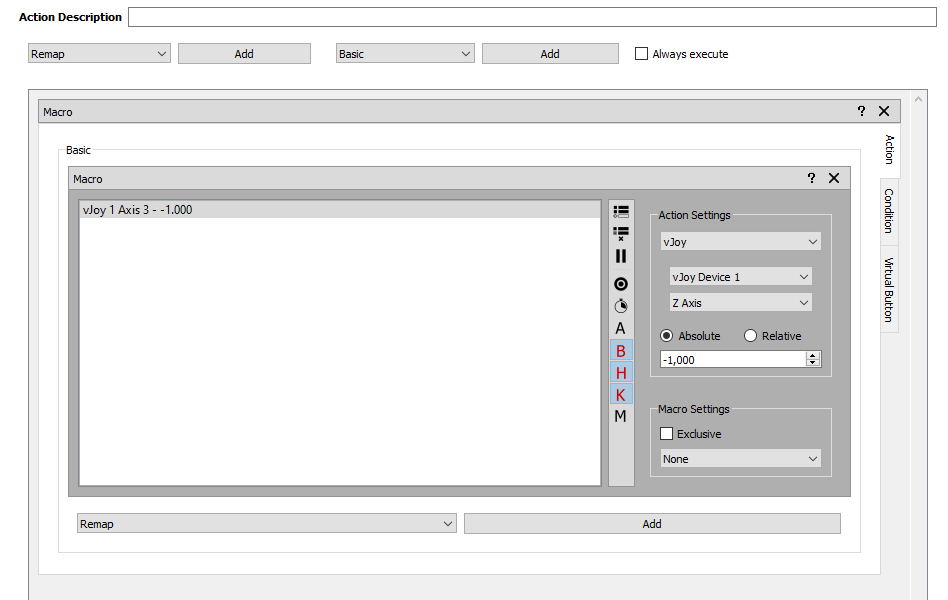
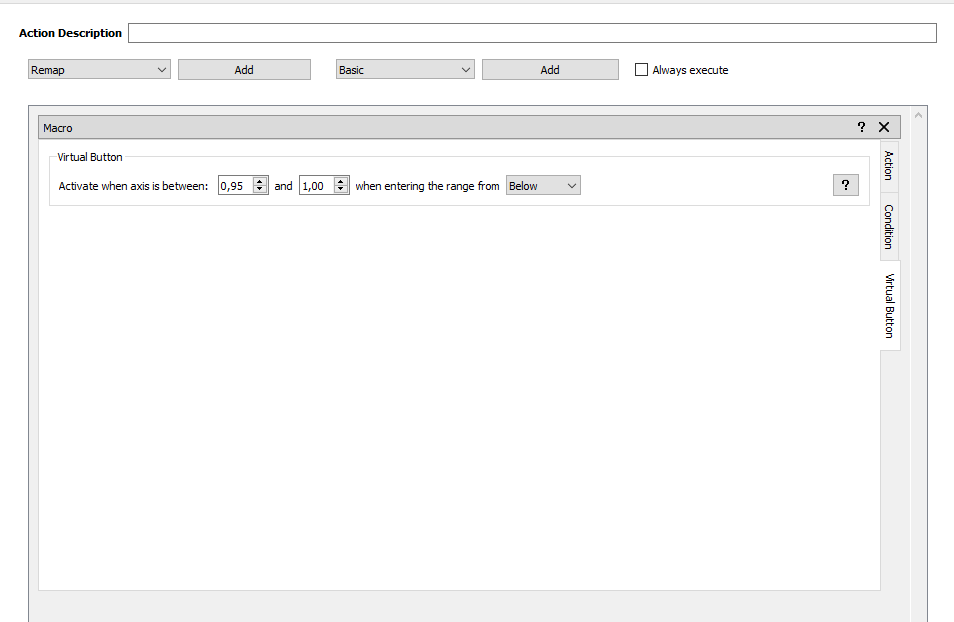
Next up we add a Macro for the slider axis. Under Action we define that the slider moves the virtual throttle (Z axis) to 100% (i.e. up to -1,000). That's the level at which we want our AB to kick in.
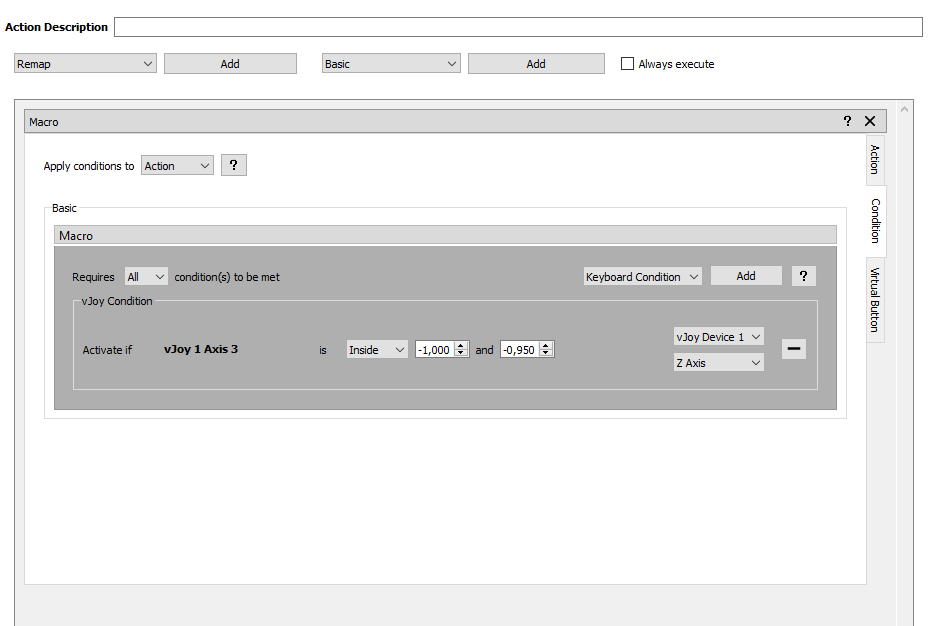
Use the Condition tab to fine-tune the engaging of the AB. We set it up so that it only moves the throttle to 100% if we're already close to the maximum point (from -1,000 to -0,950). That prevents the virtual throttle going to 100% if we push the slider up if our real throttle position is somewhere in the middle for example.
Virtual Button can also be used to further fine-tune the selectivity. If you set it up like on the picture, it will only activate if you move the slider up from below almost all the way up. That way the virtual throttle won't move to 100% if you move leave the slider all the way forward and move your real throttle all the way forward. You need to move the slider back and then again all the way forward. This prevents accidental AB engagements if you forgot to move the slider back and go into mil-power.
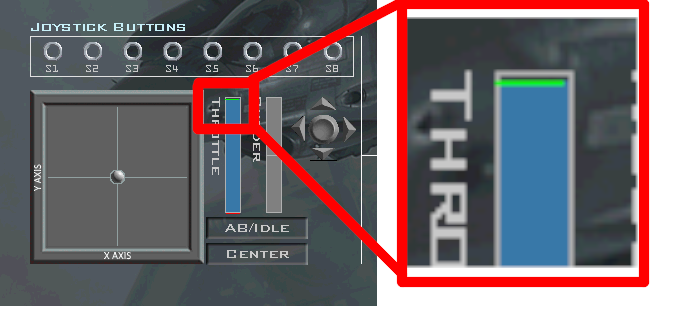
Next we have to set up Falcon BMS itself. Pick your VJoy joystick and move your throttle all the way up. You'll see how it's almost all the way up. Set the AB detent position at this position (see picture of the green line and the throttle being just below it).
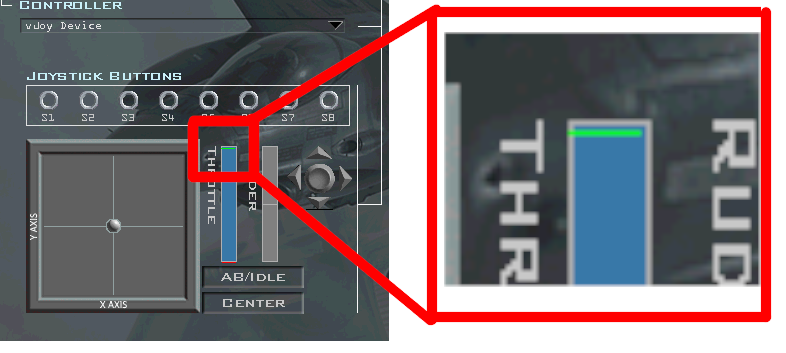
When you move the slider all the way up now, you'll notice the throttle moving past the green detent position. That means you're in AB now (see picture below).
That's it. Now you have the whole throttle range for mil-power and you can precisely engage the AB by moving the slider up.
You might ask yourself why I just didn't share my profile. It's because it contains the GUID of my X52 Pro and yours might be different and you might use less or more buttons than I do (I use 39, since Falcon BMS supports more than just 32 DX buttons now).